By Marc Ornstein
The lesson from Aesop’s Fable of The Tortoise and the Hare is that “Slow and steady wins the race” might equally well serve as the mantra of learning FreeStyle. When on the water teaching FreeStyle I generally begin by describing a maneuver, explaining its parts and what it is useful for, and often why it might be a better option in a given situation than some of its alternatives. I then demonstrate the maneuver before having the student/s give it a try. Nearly without exception, my next statement is likely to be “slow down”. It is a statement that I’ll probably repeat many times before the class is over and in following sessions.
The tendency amongst most students is to take three, four or more strokes, getting up a head of steam before initiating the maneuver. Their hope is that the momentum they have generated will carry them through a 180 degree turn, ( the artificial benchmark ) that has become the standard for practicing most FreeStyle maneuvers.
The problems with the fast and furious approach are numerous. The effects of minor “flaws” in paddle placement are magnified. The effects of heel and pitch likewise. The inevitable boat bobble accompanying the fast and furious approach kills whatever momentum the paddler generated. The paddler has no opportunity to develop any feel for how the blade, body or boat are interacting. The exercise becomes merely the rough execution of a series of memorized steps. Add to that, the instructor cannot begin to dissect the performance as the parts of the maneuver are reduced to the quick blur of a flailing paddle, and a paddler in a boat that didn’t end up where planned.
 The solution is to slow things down. Break the exercise down into individual steps, beginning even before the maneuver. Before the maneuver you ask? Yes, because the movement of the canoe, before initiating the maneuver, is critical. As such, I begin with helping the student/s fine tune their forward stroke (cross, reverse or cross reverse stroke as applicable). If the forward stroke is sloppy, it guarantees that the maneuver will be likewise. The canoe might not even turn at all. I encourage the student/s to initiate the maneuver after only one, gentle, forward stroke. A single well executed gentle forward stroke is generally all that is needed to create a bit of momentum. I may occasionally allow a second stroke if it is breezy or the water is choppy.
Complete freestyle maneuvers generally consist of three primary parts – an initiation, a placement and a conclusion. In many functional or practical situations, the conclusion or even the placement may be truncated once the canoe has turned sufficiently but, for learning/practice purposes, we include all three parts and aim for that 180 degree benchmark turn.
 We begin with the initiation. The initiation is anything we do to nudge the canoe in the direction we desire. It’s a little push or pull that gets things going. It tells the canoe which way we plan to turn. If we plan on turning toward the paddle side – doing an axle for example — we need to give the canoe a nudge in that direction. A J correction at the end of the last forward stroke is the most common initiation. A gentle J, held a bit longer than one would for a simple correction, is all that is needed. Now, cleanly slice the paddle out of the water and ride the turn that was just initiated. With a bit of practice, this alone will likely accomplish a 90 deg. turn. After practicing this a few times, I’ll have the student add some modest heel and a bit of pitch. With some practice, on a calm day, it is possible to spin the canoe 90 degrees or more with just this initiation.
Assuming we have been successful to this point, I’ll have my student/s add a placement to the mix. Instead of slicing the paddle out of the water after the initiation, I’ll have them slice it into the placement position. This too needs to be broken down in that the slice must be smooth and clean. The paddle must slice cleanly from the conclusion of the J (far back near the stern) to the placement point (forward of the canoe’s center of rotation) without creating significant sideways forces along the way. In other words, the blade must slice parallel to the centerline (keel line) of the canoe, the leading edge not turned inward or outward until it reaches the placement point. Learning to do a clean slice is often an important exercise of its own. It’s not uncommon to spend significant time teaching and practicing the slice. If the slice isn’t clean it will likely spoil the rest of the maneuver. By slicing slowly, the student can feel what the paddle is doing. If they feel the blade pulling away from or prying toward the hull, the slice isn’t clean/neutral and it’s time to correct that before moving on. We are now ready for the placement.
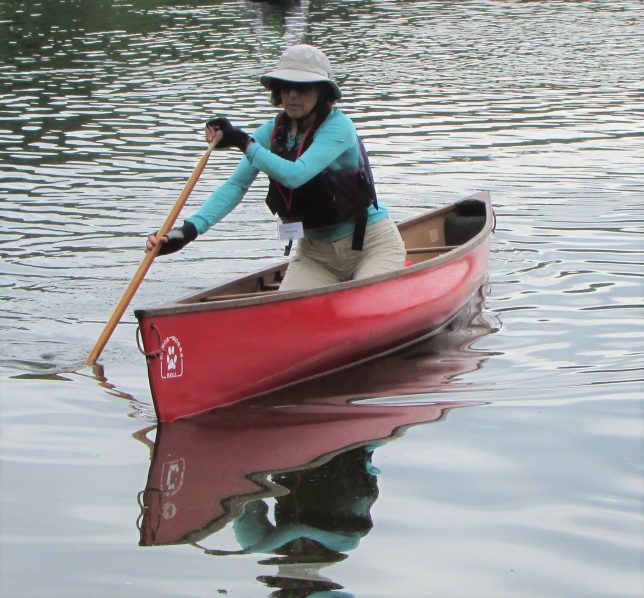
 Staying with our assumption that this maneuver will be an axle, the placement for the blade is a bit forward of the canoe’s center of rotation, which for practical purposes will be approximately at the paddler’s knee. Once the blade has been cleanly sliced to this point, the leading edge is turned out a bit, or in other words, turned a bit toward the direction that you have already told (initiated) the canoe to turn. This turning out or opening of the blade is gentle and gradual. It is a slight angle. Too much angle and the turn will stall prematurely. Assuming that this placement has been well executed, I now encourage my student/s to hold onto the placement. They should be feeling a gentle pull on the blade toward the direction of the turn. This is a time to enjoy the ride, to feel the canoe gracefully glide through the turn, slowly expending the momentum that was developed with that single forward stroke. My students are used to hearing me repeat “ride it, ride it, ride it” far longer than they thought they could. If that forward stroke, initiation, slice and placement were all clean, if some modest heel and pitch was applied, and if there was minimal bobble, the canoe should easily glide to or beyond the magical 180 degrees.
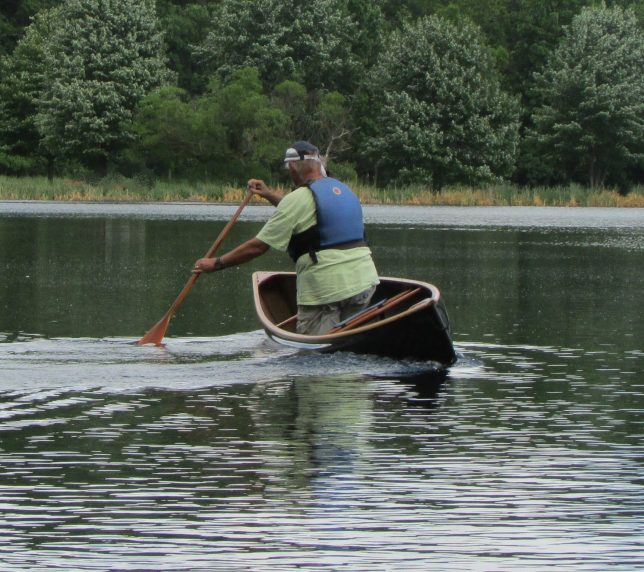
We’re now ready for the conclusion, the final part of the maneuver. Once again, slow and steady. Don’t rush it. Break things down into small bites. From the placement the blade is allowed to drift out (away) from the hull. A foot or so is adequate. Remember, the blade has been pulling in this direction already. Feel the blade drift out as it continues to pull the canoe through the turn. While drifting out, the blade is also sliced forward, a foot or so. Once the blade has reached this new position, it is drawn gently in toward the bow (a bow draw) and then rotated (so that the grip hand thumb is pointing outward) until it is perpendicular to the keel line and at the catch position ready to begin the next forward stroke. For teaching/learning purposes, this conclusion may also be broken down. If at any time the paddler feels the least bit of pressure on the blade pulling or pushing the canoe in a direction other than that intended, it’s time to stop, examine why and correct before proceeding.
 |
 |
Whether you are the student or teacher, don’t lose sight of the basics. In this example (an axle) the blade is kept nearly perpendicular to the water surface throughout the maneuver. Although the paddle is in a high brace-like position throughout most of the maneuver, its purpose is not to serve as a brace but instead to nudge and then draw the canoe through the turn. If the paddle is relied on as a brace, the maneuver will be rushed, and the turn will likely stall prematurely. At best, a rushed turn will waste momentum that could have been used going into the next maneuver or stroke.
This break it down into “bite sized pieces” approach can and should be applied to teaching/learning any maneuver. Eventually all of the parts and pieces will blend, flowing together seamlessly. Take your time and break it down. Slow and steady wins the race.